

How To Save Settings On Lightroom
Creating your own Lightroom presets can salve a lot of fourth dimension when editing photos. With the touch of a button you tin can quickly utilise your most common adjustments to many different images at once.
You'll improve your photo editing workflow and spend less time editing photos. And you lot'll have full command over how your images look.

What You Need to Follow This Tutorial
- Lightroom CC, or another version of Adobe Lightroom
- A few photos to experiment with (RAW images)
JPEG files commonly have less details to edit than RAW files.
JPEGs are much smaller than RAWs when it comes to file size.
This is because JPEGs are automatically compressed as presently as they're made. Considering of this, it'due south much harder to edit them.
Uncompressed paradigm data in RAW files makes it easier to create Lightroom presets with a wide range of tones. If you're going to create Lightroom presets, I recommend experimenting with a variety of RAW photos.
Make sure yous accept at least 3. That way you'll have a better idea of what your preset will look like in unlike lighting situations.
How to Make Lightroom Presets
Lightroom has a wide diversity of editing panels. Some of them will let you edit very specific parts of your image while others will focus on general tones.
You can requite your epitome a new look in post-production. Whether you lot're using vintage Lightroom presets for portrait photography or trying to make the colors more than vivid in your nutrient photography.
The kind of panels you'll use depends only on your gustatory modality or on your customer's requirements. Keep in mind that the expect wedding photographers will exist after is very different from existent estate photographers.
I try to exist selective when I brand Lightroom presets. The more than subtle my presets are, the easier it will be to apply them to all kinds of images.
Yous might accept a set of images that need to expect dramatic, so you might be subsequently more intense portrait presets. Then you'll have a completely different look to your preset.
The process of making and saving one is the same though.
If you're not feeling upwardly to making your own Lightroom presets today, check out our list of the all-time free Lightroom presets out there.
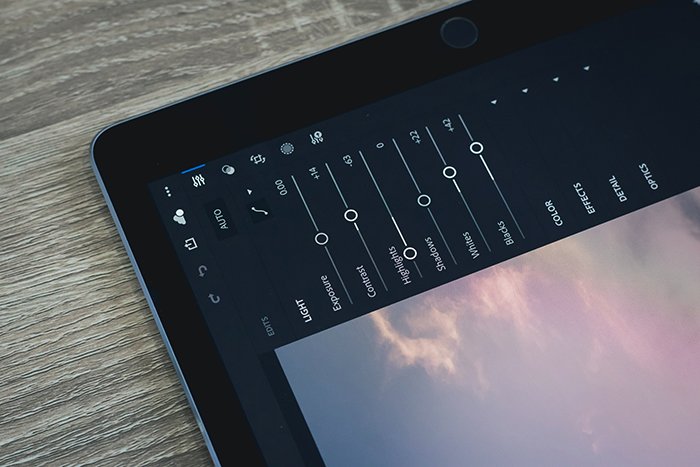
To start making your preset, go to the Develop module in Lightroom. At that place, you'll find ix panels.
Basic
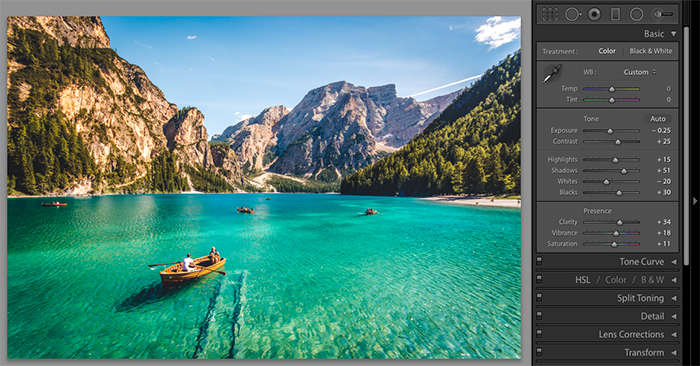
The Basic console features 11 sliders that almost every lensman will observe useful.
Since the brightness in every photograph is dissimilar, exist careful when you lot use the exposure slider. Unless you lot're making a preset for a very specific set of photos with similar exposures, feel free to ignore this tool.
Highlights, shadows, whites, and blacks will restore shadows and create contrast. And they'll get rid of excessive effulgence.
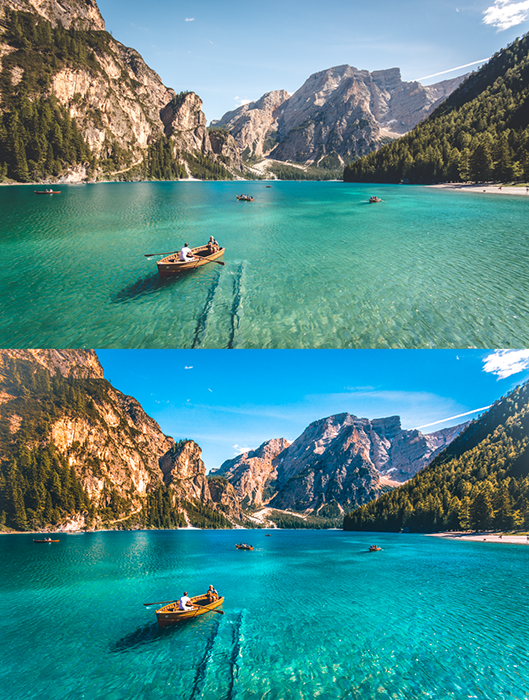
Clarity will add depth to your photo. If you take a very textured image, be careful with this slider. For a portrait photo, +34 clarity would be too much. For a smooth landscape shot like this, adding a lot of clarity isn't a trouble.
Vibrance and saturation will increase or decrease the intensity of your photograph's colours.
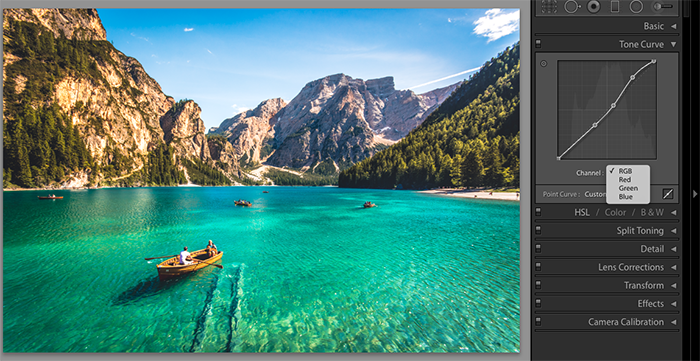
Tone Curve
As its name suggests, the Tone Bend tool controls tones. There's no right or wrong mode to use this tool.
You tin can ignore it, use the RGB channel but, or experiment with the Red, Dark-green, and Bluish channels.
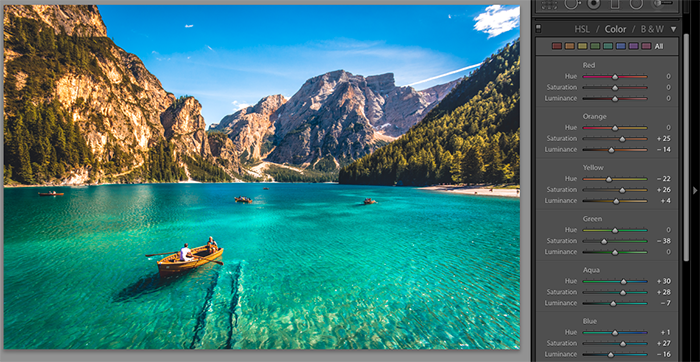
HSL/Colour/B&Westward
There are three different sections in this panel. HSL and Colour will let yous edit the hue, saturation, and luminance of every color in your prototype.
This is ideal for photos in which certain tones don't await right. It's besides great for creating surreal photos. Using the hue slider, you tin completely alter how certain colours look!
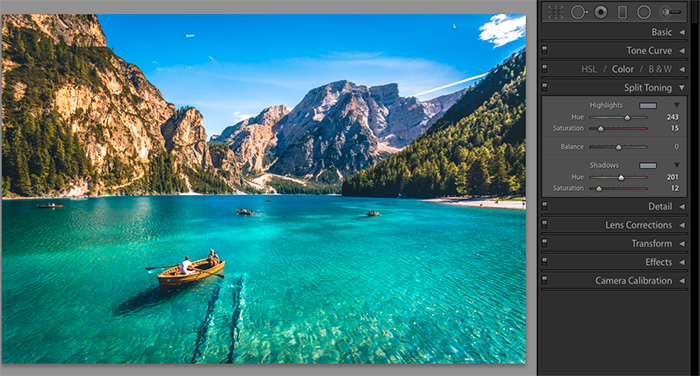
Split Toning
This is one of the simplest panels in Lightroom. You can edit the hue of your highlights and shadows here.
Split up Toning usually makes photos expect dreamier and more nostalgic.
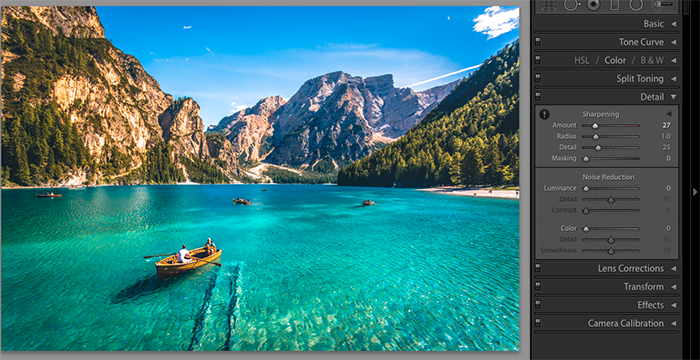
Item
If your photo isn't eye-catching enough, you tin can increase its sharpness in this panel. Detail likewise provides a solution for photographers with grainy photos.
The dissonance reduction tool will make noisy photos wait more natural.
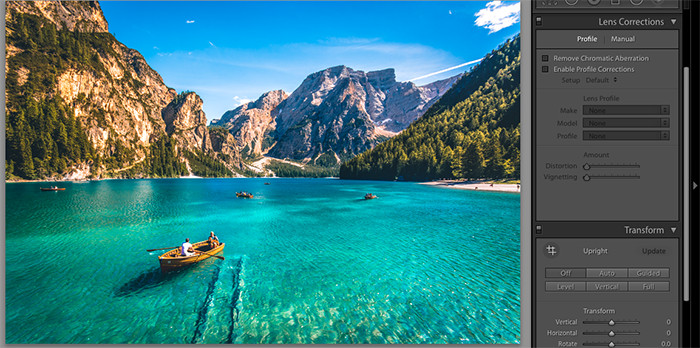
Lens Corrections and Transform
If your photos await distorted, you can fix them using these two panels. I wouldn't recommend adding these corrections to your preset, though.
Every image is different. So it's unlikely that a single preset will fix all kinds of distortions.
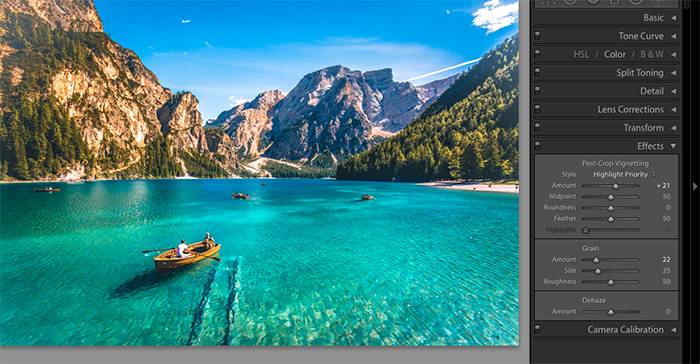
Furnishings
Fans of analogue photography love the Effects panel because of its Grain slider.
Here, you tin also add vignettes to either darken or lighten the edges in your photos.
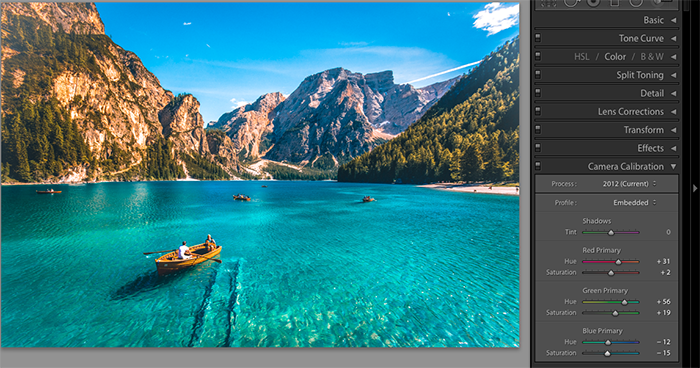
Camera Calibration
If you desire to experiment with unlike colour effects, you'll like this panel.
Many popular Instagram accounts utilise it to give their photos a very specific look similar the one in a higher place.
How to Save Lightroom Presets
Once y'all're happy with your result, click on the plus sign on the left side of your screen. This will open a new window. Give your preset a name and select the settings that you used.
You can either relieve your preset in a specific binder or in a general folder entitled User Presets. In one case everything is set, click on Create.

One time your preset is saved, it volition appear under the folder you selected. Now y'all can apply it in the Develop module.

You might want to share your Lightroom presets with someone else. Or merely continue it in a binder in case Lightroom crashes. To achieve either of these, you should export your preset.
To do that, right click on your preset, select Export, and choose the folder you lot'd like to salvage your preset in. Now you tin can share and store it anywhere you lot like.
When I export a set of Lightroom presets, I like to keep them in a zipped folder to avoid handful them all over the identify.
How to Apply Lightroom Presets to Several Images at Once
An reward of using Lightroom presets is speed. Yous can utilise the same preset to hundreds of images with ane click.
To practice this, import your photos to Lightroom, making certain you're in the Library module. Select all your photos and choose your preset under the Quick Develop panel.
This is also an opportunity to preview your results. You can make whatsoever quick changes if something doesn't await right.
If your preset desaturated your photos too much, you can increase their vibrance. Click on the right arrow in the Quick Develop console to do this.

Conclusion
Getting amend at editing and making presets has improved my photos. And my workflow's faster now.
Knowing how to make and save Lightroom presets will requite you a better understanding of what makes a photo stand up out.
Familiarize yourself with the panels to a higher place. Y'all'll exist able to create photos that are non only visually appealing, but easy to edit using your very own presets.
If you're non feeling up to making your own Lightroom presets today, don't forget to check out our list of the best free Lightroom presets.
And if you're looking for the best Lightroom presets for street photography, check out this list.
If landscape photography is your thing, check out these gratis Adobe Lightroom presets hither.

How To Save Settings On Lightroom,
Source: https://expertphotography.com/lightroom-presets/
Posted by: beltgulay1984.blogspot.com
0 Response to "How To Save Settings On Lightroom"
Post a Comment